React NativeとFirebaseでチャットサンプルを作る
2019.6.3
React NativeとFirebaseを使って簡単なチャットのサンプルを作ってみました。
React NativeとFirebaseを連携させるためにReact Native Firebaseを使います。
react-native-firebase-starterでプロジェクトの雛形を作る
以前の記事『React Native環境構築』ではreact-native-cliを使ってプロジェクトを作りましたが、今回はトップページのBasic Starter Kitを使ってプロジェクトの雛形を作ります。
まずクローンします。
git clone https://github.com/invertase/react-native-firebase-starter.git
クローンしたディレクトに移動して依存モジュールをインストールします。
npm i
CocoaPodsでiosのモジュールをインストールします。(CocoaPodsのインストール方法はこちら)
cd ios
pod install
プロジェクトをリネームします。プロジェクトのルートディレクトリにて以下を実行します。プロジェクトの名前とカンパニーの名前を聞かれるので入力します。
npm run rename
プロジェクト名ReactNativeSample、カンパニー名kwstにすると、エラーが出ました。
$ npm run rename

> RNFirebaseStarter@5.4.0 rename /react-native-sample
> node ./bin/rename.js

---------------------------------------------------------
Enter your Project name, e.g. My Amazing Project: ReactNativeSample
---------------------------------------------------------
Enter your Company name, e.g. My Company: kwst
---------------------------------------------------------
---------------------------------------
Updating project name: ReactNativeSample
---------------------------------------
[replaceInFile] Error occurred:  { Error: ENFILE: file table overflow, open './ios/Pods/Headers/Private/gRPC-Core/grpc/src/core/lib/channel/handshaker.h'
  errno: -23,
  code: 'ENFILE',
  syscall: 'open',
  path: './ios/Pods/Headers/Private/gRPC-Core/grpc/src/core/lib/channel/handshaker.h' }
(node:13697) UnhandledPromiseRejectionWarning: Error: ENFILE: file table overflow, open './ios/Pods/Headers/Private/gRPC-Core/grpc/src/core/lib/channel/handshaker.h'
(node:13697) UnhandledPromiseRejectionWarning: Unhandled promise rejection. This error originated either by throwing inside of an async function without a catch block, or by rejecting a promise which was not handled with .catch(). (rejection id: 1)
(node:13697) [DEP0018] DeprecationWarning: Unhandled promise rejections are deprecated. In the future, promise rejections that are not handled will terminate the Node.js process with a non-zero exit code.
プロジェクト名ReactNativeSample、カンパニー名Kwstを入力するといけました。以下の情報が表示されました。Package nameはFirebaseの設定で使うそうなので控えておきます。
Project name:  ReactNativeSample
Company name:  kwst
Package name:  com.kwst.reactnativesample
Firebaseの設定
Firebaseの基本的な設定方法は以前の記事『FlutterアプリをFirebaseと連携させる』と似たような要領です。
iOSアプリの設定時にバンドルIDを先ほど控えたPackage nameであるcom.kwst.reactnativesampleを入力します。
GoogleService-Info.plistをダウンロードしてきて/iosディレクトリに配置します。Xcodeプロジェクト(ReactNativeSample.xcodeproj)を開いて右クリックからAdd Files to "ReactNativeSample"でGoogleService-Info.plistを選択してプロジェクトに追加します。バンドルIDは先程のcom.kwst.reactnativesampleを入力します。
今回はログイン方法をメール/パスワードと匿名の2つをONにします。
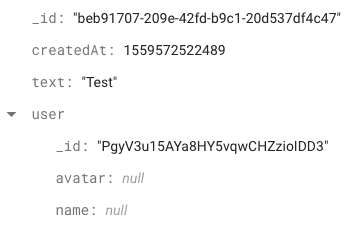
チャットデータのスキーマはこのような感じにしました。後述のGiftedChatのメッセージデータに合わせたものになっています。
GiftedChat
ReactNativeでチャットUIをお手軽に提供してくれるライブラリreact-native-gifted-chatを使ってみます。
インストール
npm i react-native-gifted-chat
コンポーネントの使い方はこんな感じです。これだけでチャットUIを実装できます。
<GiftedChat
  messages={メッセージオブジェクトの配列}
  onSend={messages => {
    // 送信ハンドラ
  }}
  user={ユーザオブジェクト}
/>
メッセージオブジェクトのインターフェースは以下のようになっています。
interface IMessage {
  _id: any;
  text: string;
  createdAt: Date | number;
  user: User;
}
ユーザオブジェクトのインターフェースは以下の通り。
interface User {
  _id: any;
  name?: string;
  avatar?: string | renderFunction;
}
起動時にエラーが出たのでtslibをnpm i -D tslibでインストールしておきます。
error: bundling failed: Error: Unable to resolve module `tslib` from `react-native-sample/node_modules/react-native-gifted-chat/lib/Avatar.js`: Module `tslib` does not exist in the Haste module map
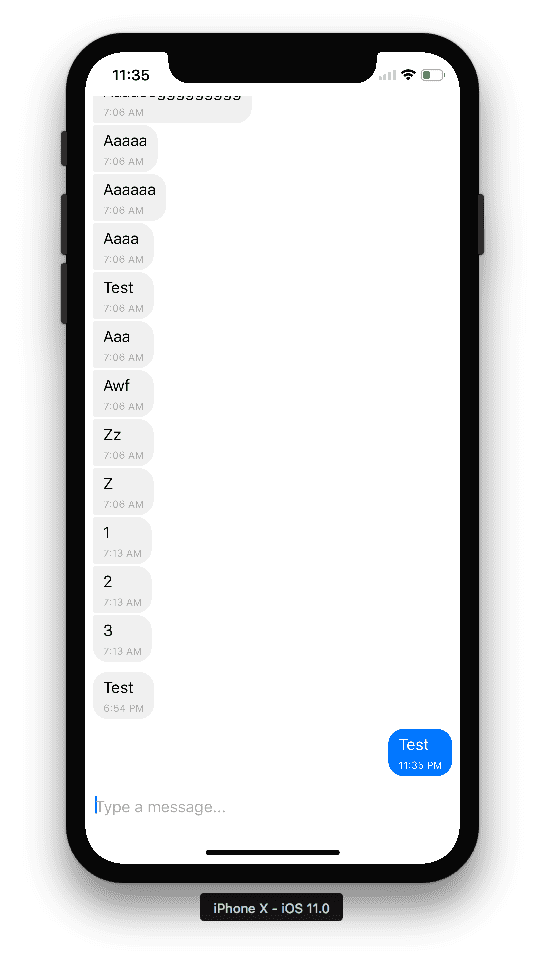
出来上がったチャット画面はこんな感じです。
React Native Elements
ログイン画面を作るためにUIコンポーネントライブラリReact Native Elementsを使ってみました。一通りのUIコンポーネントが揃っています。
インストール
npm i react-native-elements
npm i react-native-vector-icons
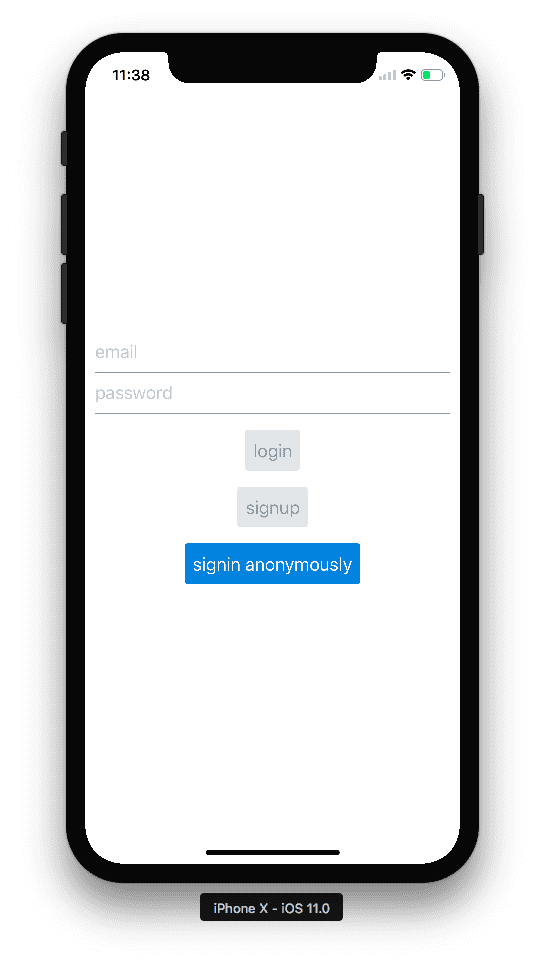
出来上がったログイン画面はこんな感じです。


